Local capture
作業中の prompt、response、file edit、attribution の手がかりを agent hook で集めます。
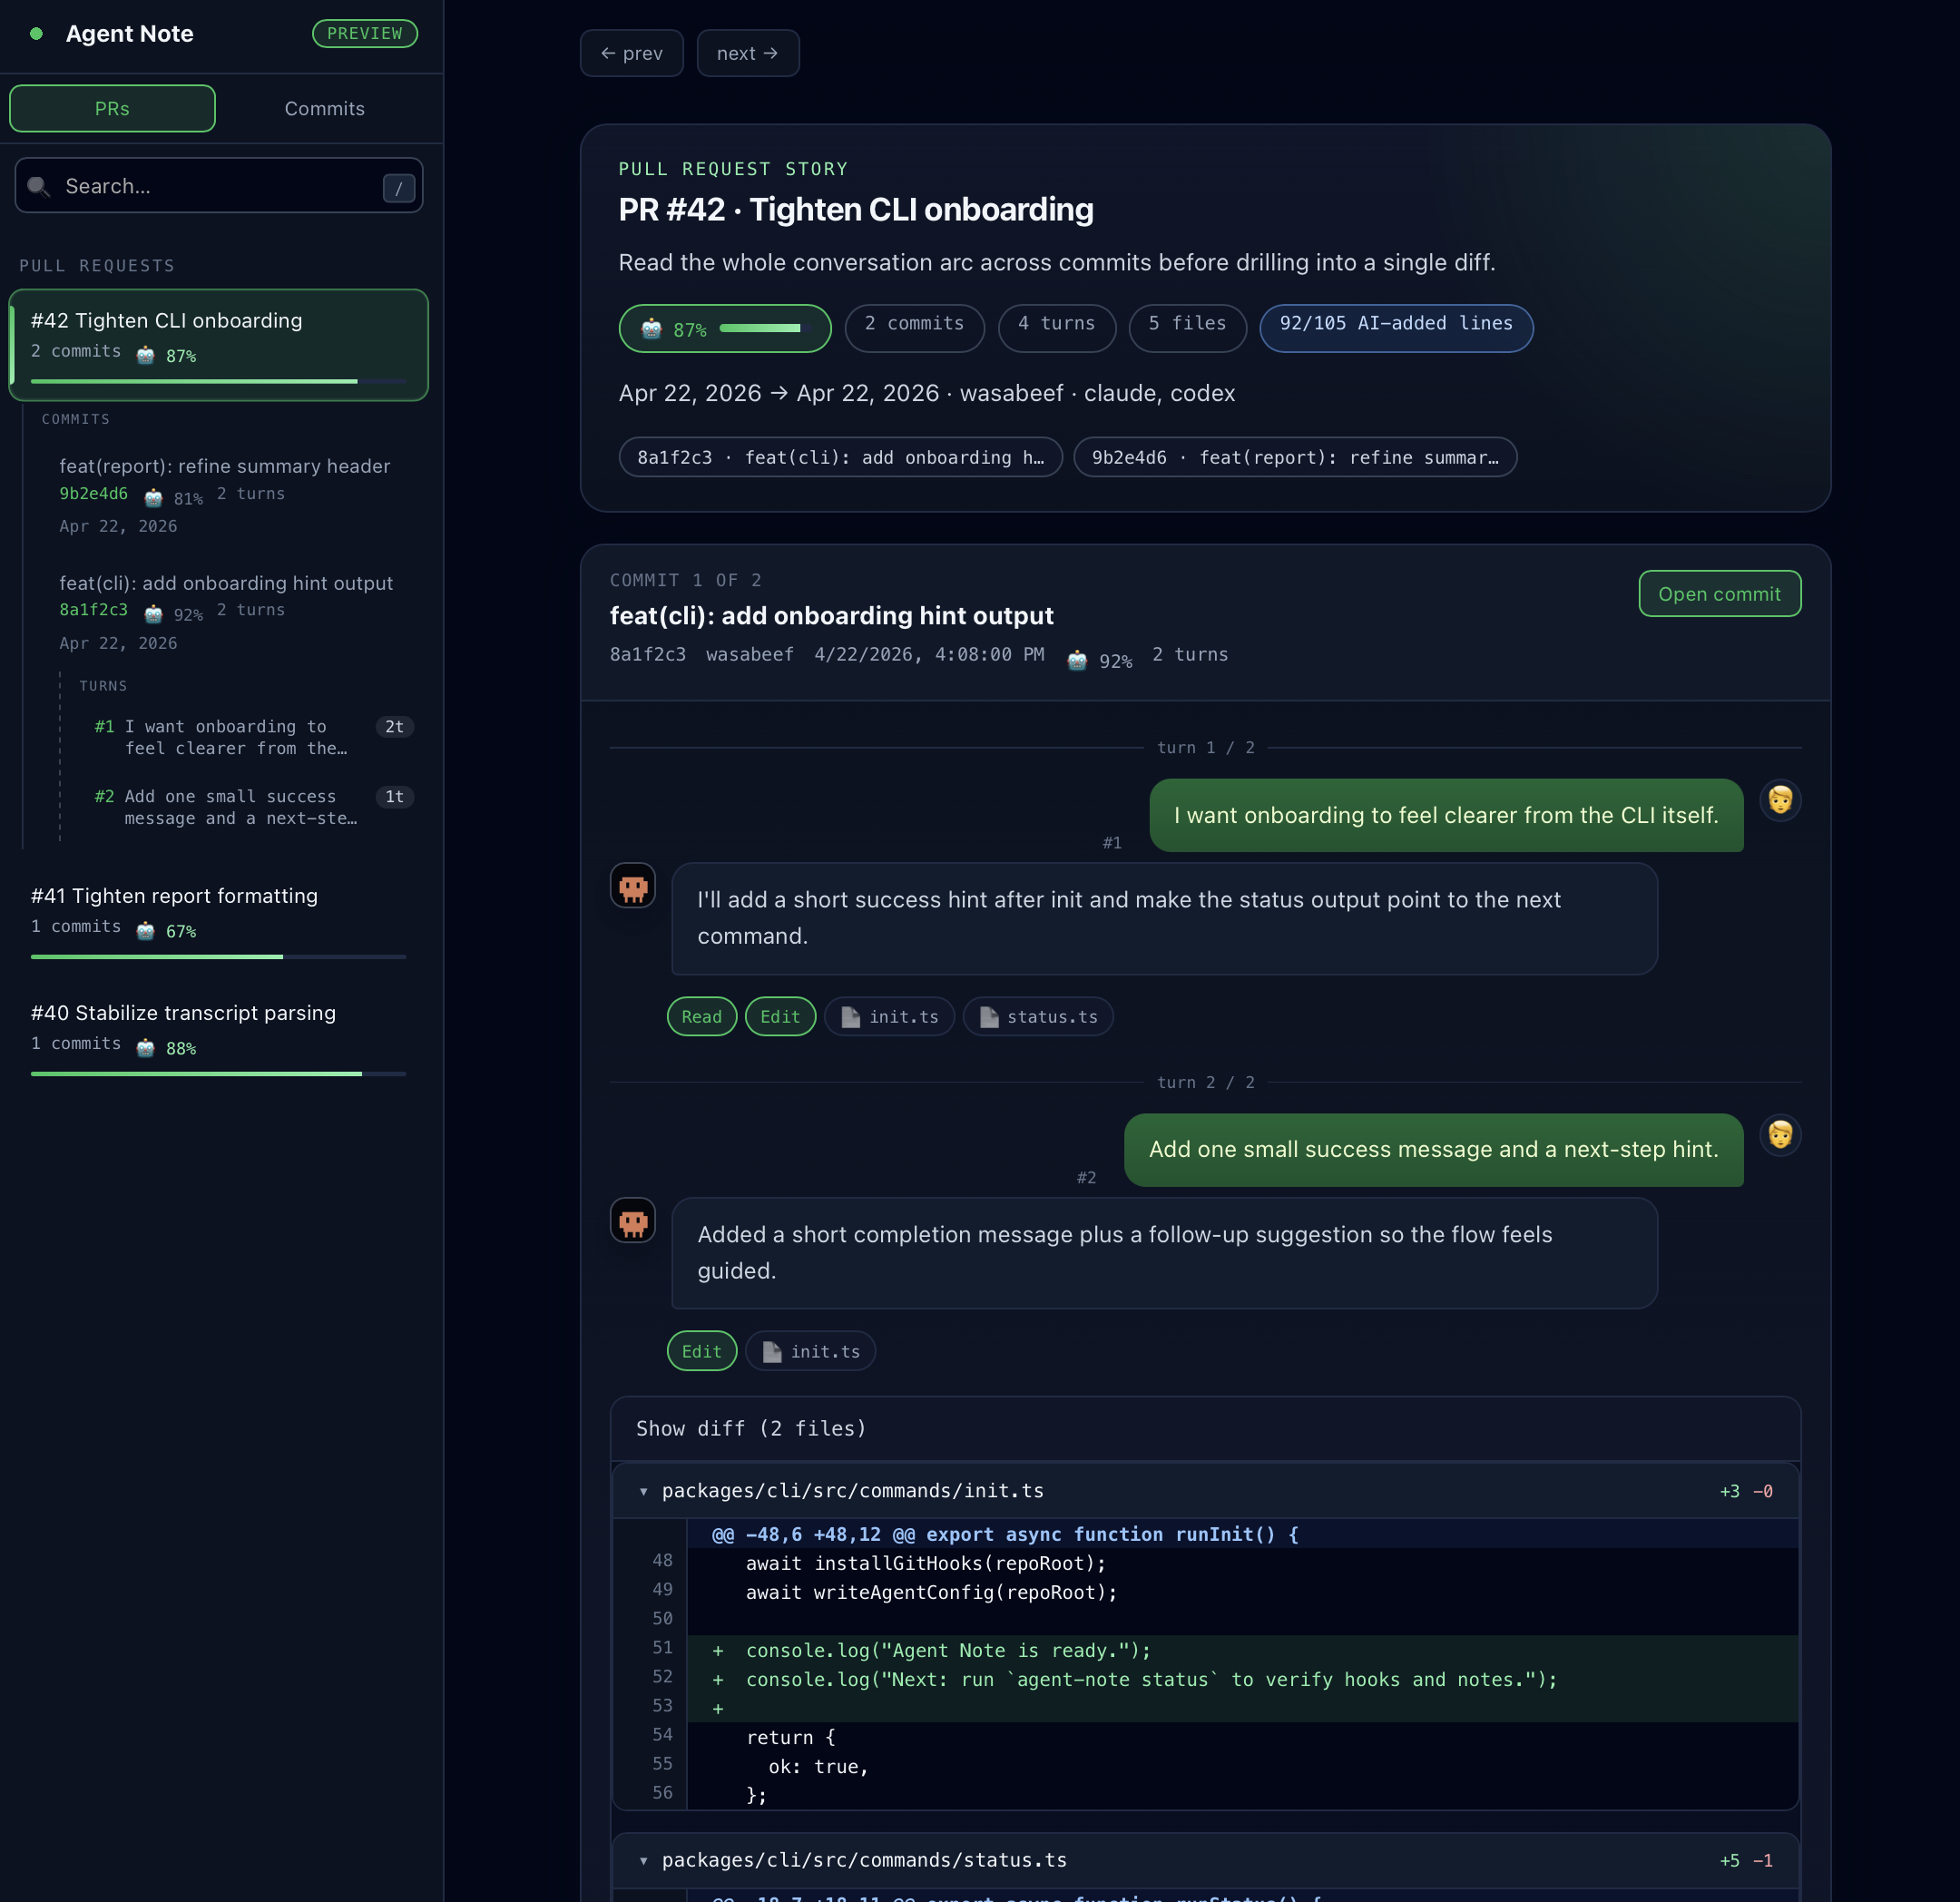
Agent Note は、AI と進めた実装の「なぜ」を code review に残すための tool です。prompt、response、触った file、model、attribution の手がかりを commit に紐づけます。
このページは全体の地図です。いきなり細かい option に入るのではなく、fresh repository から最初の PR Report までの流れを短く確認できます。
Local capture
作業中の prompt、response、file edit、attribution の手がかりを agent hook で集めます。
Git-native history
各 commit に refs/notes/agentnote の git note を付けます。branch の中身は汚しません。
Pull Request context
GitHub Action が git notes を読み、reviewer 向けの PR Report を作ります。
Optional Dashboard
チームで 1 つの履歴ページを見たい場合は、GitHub Pages に Dashboard を公開できます。
repository に Agent Note をインストールします。
実際に npx agent-note init を実行する段階になったら インストール に進んでください。
生成された agent config と workflow を commit します。
team で共有する設定は repository に残し、local git hook は clone ごとに入れます。
Pull Request を開きます。
生成された GitHub Action が refs/notes/agentnote を読み、PR Report を書き込みます。
必要な場合だけ Dashboard を追加します。
多くの team は PR Report だけで十分です。open / merged PR の履歴を 1 つの画面で見たい場合に Dashboard を使います。
| やりたいこと | 読むページ |
|---|---|
| いま Agent Note を入れる | インストール |
| Pull Request の report を設定する | GitHub Action |
| team 共有の画面を公開する | Dashboard |
| agent ごとの取得範囲を確認する | エージェント対応 |
| 保存される data と見える範囲を知る | データとプライバシー |
| notes や prompt が出ない問題を直す | Troubleshooting |
セットアップ後は、通常の git commit と git push で十分です。Pull Request には Agent Note section が入り、AI Ratio、model、commit table、各 commit を説明する prompt が表示されます。
まず raw data を確認したい場合:
npx agent-note statusnpx agent-note show